My first major foray into 3D was a short animation about tattoos and their biological implications, particularly with the good ol’ macrophage. This was one of the few projects we had completely free range to choose any topic we wanted (with approval, of course)! So I wanted to have some fun with it. It was created for a general audience wanting to know a bit about how tattoos are made. This was not only one of the longest projects we had, but probably the most taxing and often frustrating. The learning curve with 3D work is long and steep! But by the end, I walked away with a decent toolbox of skills and knowledge in an art form I never imagined myself learning! Read about my process below:
After doing the research, the first step of this project was writing the script. The script is very important to establish very early in the process as it dictates what should be visualized. A good script should only include actions that are well visualized as well. It also is important to read through the script with a timer to make sure the animation doesn’t end up being too long. It is amazing how fast that time goes while reading the script out loud!
The script was then chunked into scenes and annotated with my envisioned visuals and any additional comments. Much of the annotated script made it into the final version of the animation, but a good portion changed throughout the course of the project.
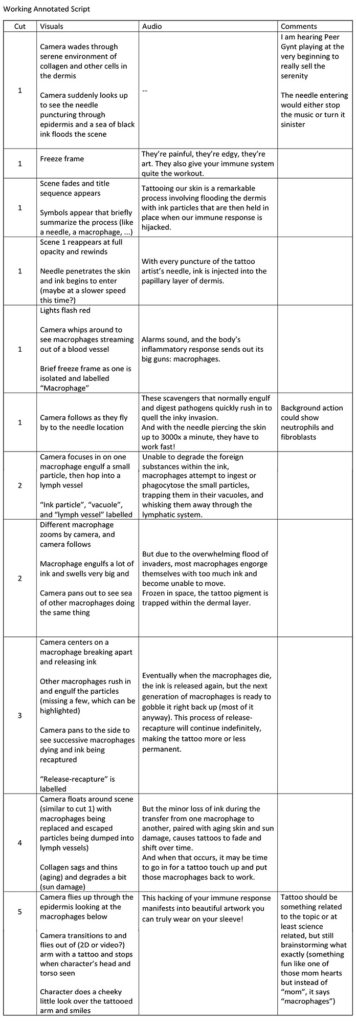
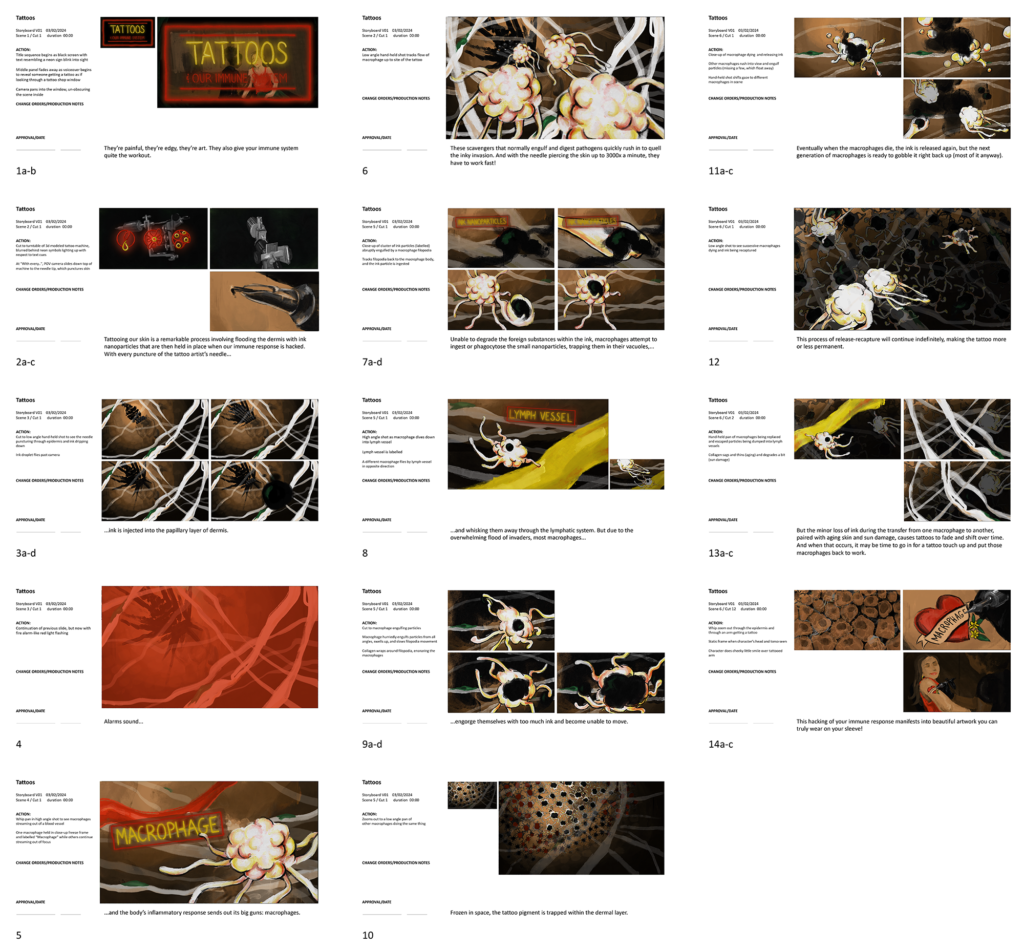
Then, it was time to storyboard! Each page of the storyboard showed a thumbnail(s) of one scene, the actions performed, and the corresponding script.
The storyboard could then be roughly animated into what is called an “animatic”. It is essentially a moving storyboard. Animating the storyboard helps you visualize the movements and gives you a better sense of timing. While the animation might look good on paper, you might not realize until it is animated that you didn’t budget enough time for every movement in one scene or another portion is super long and will absolutely bore the viewer. It is better to figure that kind of thing out now before spending weeks modeling it in Cinema4D.
It is common to include a stopwatch to the animatic. Doing this allows the animator to correctly time the final 3D models in their movements.
To note here, I don’t think my voice has the right affectations to fit the vibe of this project. For the final animation, I commissioned a very talented voice actor to recite the script!
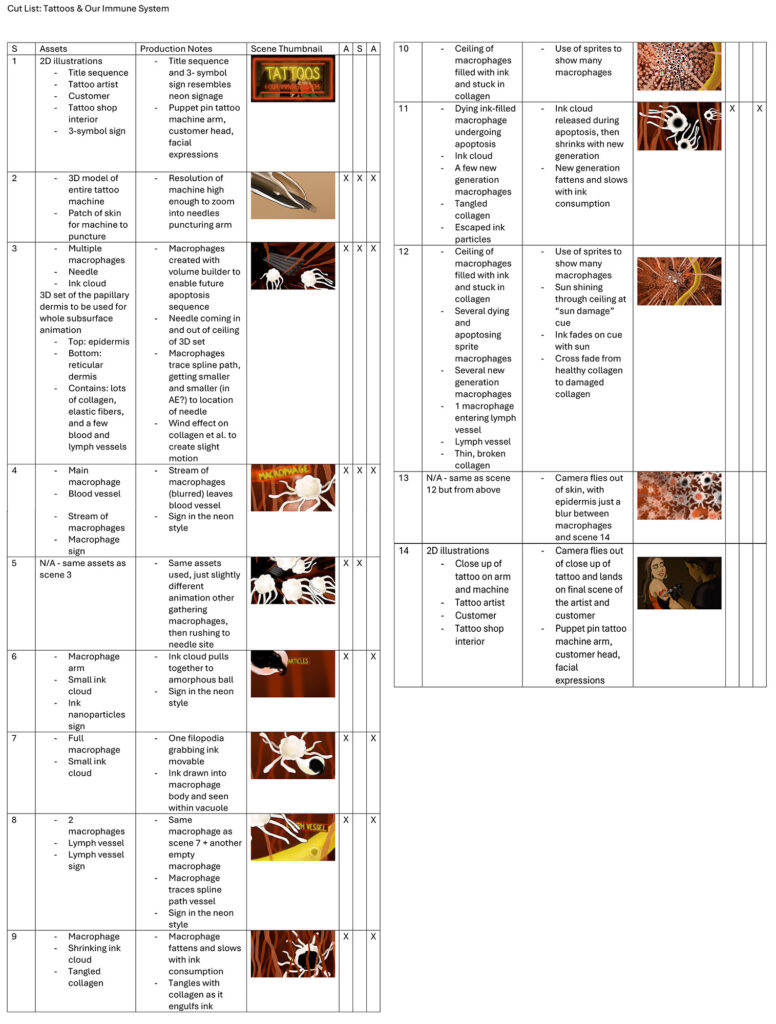
With the idea fully formed and the animatic working smoothly, the last step before diving into the modeling was to create a cut list. This basically lists out every asset I would need to create for each scene of the animation. This was helpful to keep track of all my individual pieces and helped me easily locate where particular assets could be reused.
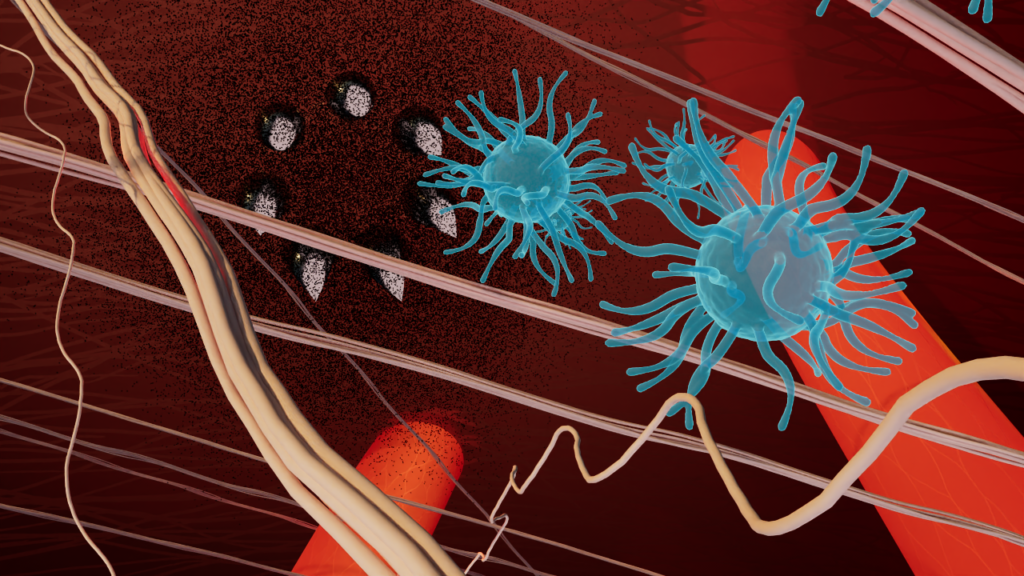
The first models I built were for the dermis setting. Originally, I had envisioned massive tangles of collagen and vessels that the macrophages would constantly be bumping into. I liked the look, but I soon learned why so many animations of the dermis never pack it as tight as it is in real life—the collagen will crash your computer. I tried many different versions of collagen models to lighten the load: splines, particle generators, clones, and level of detail to name a few.
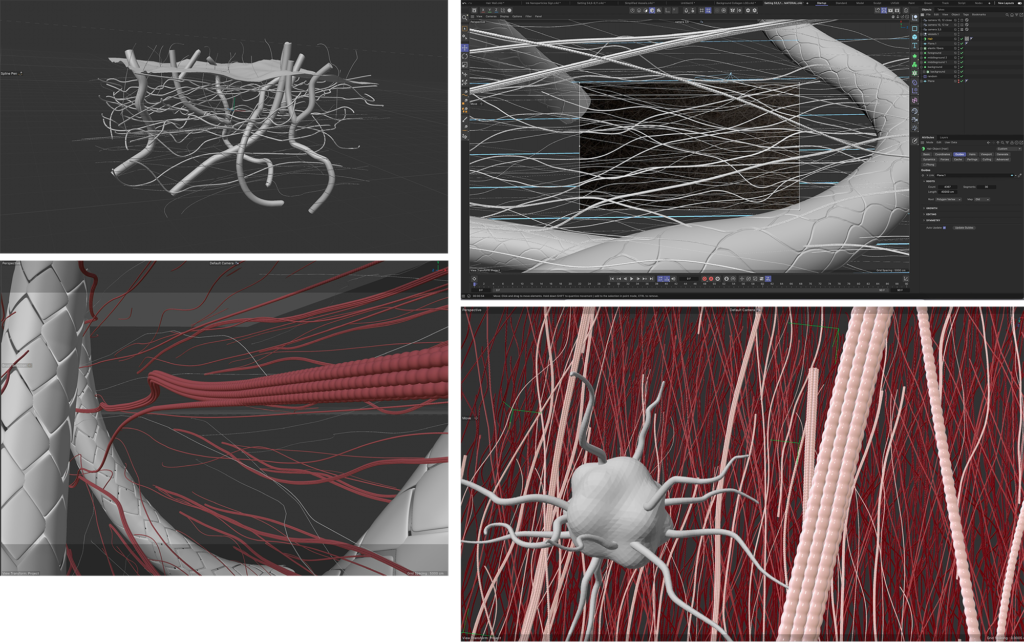
In the end, it still was too much for the computer to handle, and I had to redesign. I removed most of the collagen, leaving only a select few strands. I was still pleased with the cleaner design. I changed their orientation to create more visual interest and trick the viewer into thinking the scene was full.
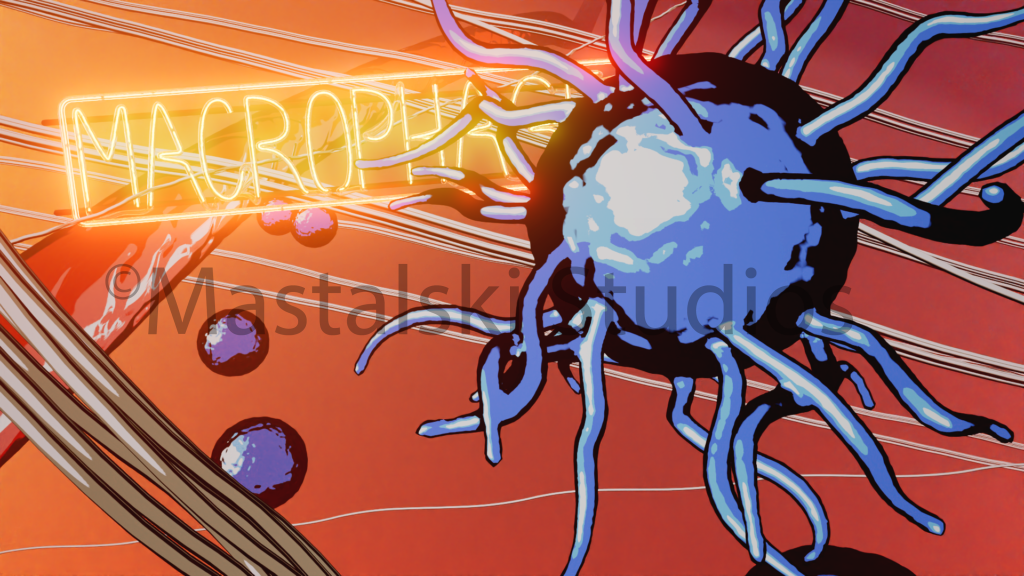
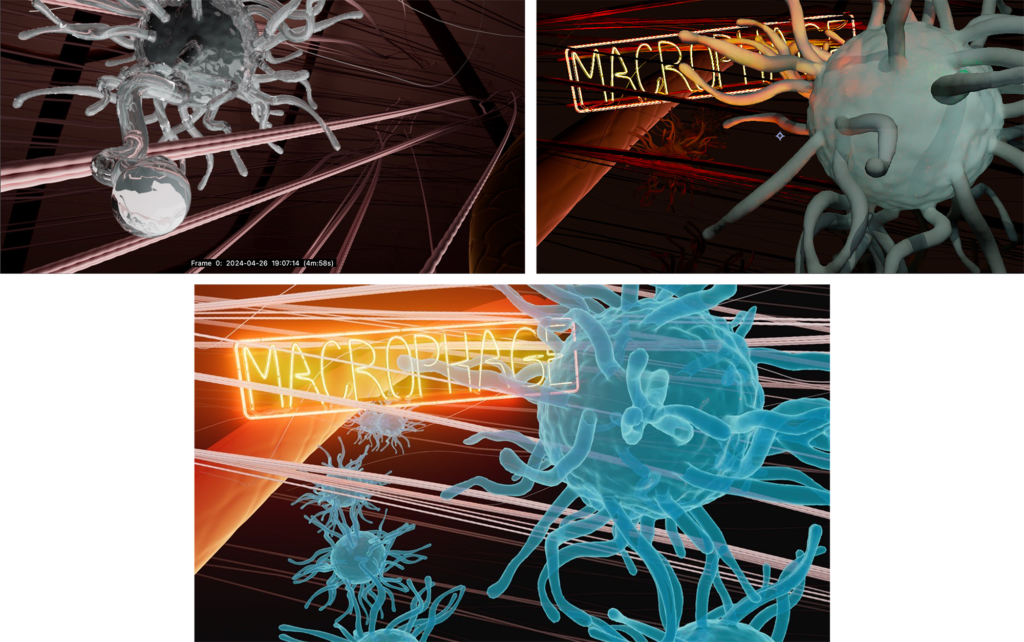
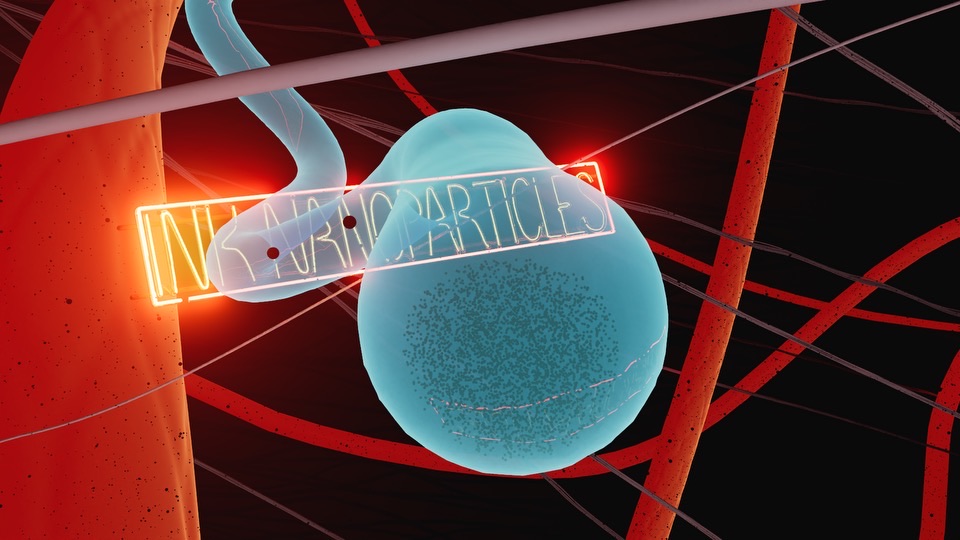
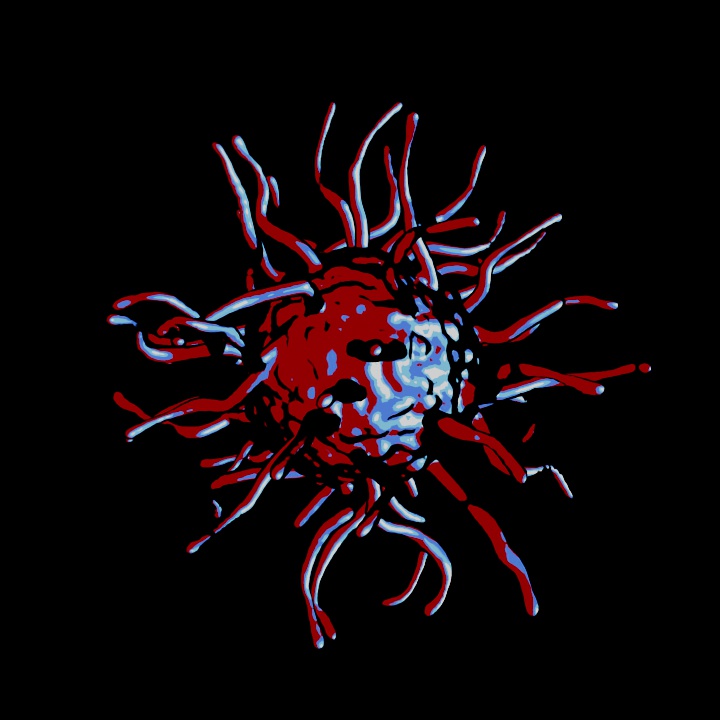
With the scene set, I moved on to creating the macrophages. The macrophages had to be eye-catching as they were the star of the show. But how do you create a material that would stand out in front of a blazing neon sign while also being transparent enough to view an engulfed ink vacuole? I experimented with most of the rainbow and the majority of textures, too. A few of my favorite materials are below. I eventually settled on this bright blue macrophage that reminded me of those blue x-ray illustrations.
For two scenes, I was determined to have the camera slowly seep deep down into the dermis, revealing a mighty wall of ink-filled macrophages hovering at the surface. This was a challenge as just thinking about creating that many macrophages, even in a cloner, would crash my computer. A solution came in the form of “sprites”, essentially a sea of single-polygon planes that could act as projectors, projecting a short film of a macrophage slowly wiggling in space. One macrophage was projected onto each plane, which was equipped with a target tag to keep the plane always facing directly at the camera. A few bundles of the sprites could then be cloned and stuck with a random generator to create more depth and variation to the wall.
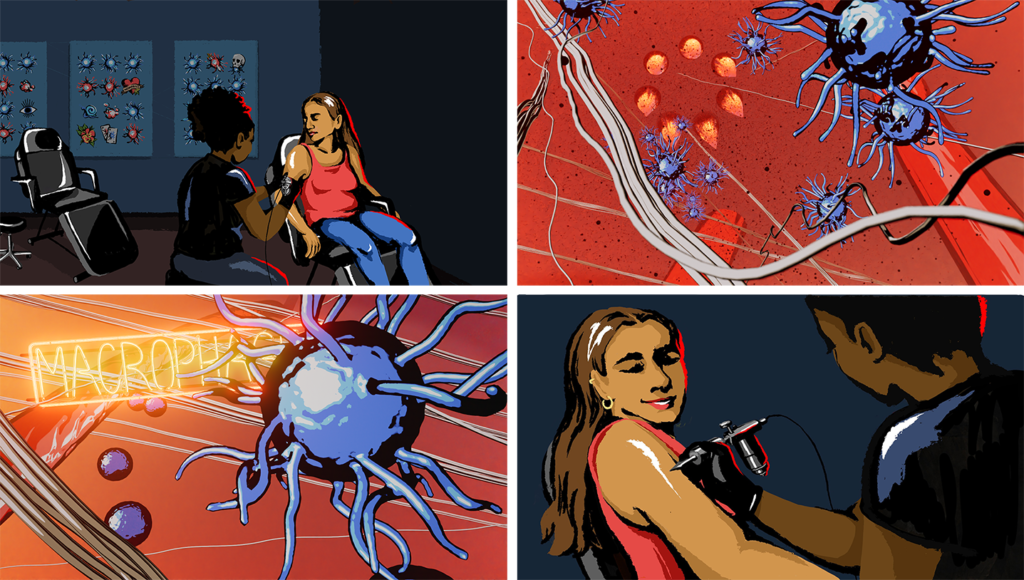
Here are a few additional stills from other scenes, just because they also took a tremendous amount of work to stage and light! The ink accumulating around the tattoo needles went through many, many revisions, and frankly, it still could use some work. When I revisited this project later on, I was able to improve the spillage. It still, however, is not exactly how I envisioned it occurring. More experimentation is definitely needed.
Here is the final animation:
Epilogue:
After stepping away from the project for almost a year, I developed a few more skills in Cinema4D and discovered a few more techniques to redo aspects of the animation I felt could still be improved. One of those techniques was RS Toon, which I discovered while working on my thesis project. I thought I could improve the overall feel and aesthetic of the piece by reworking the style to make the whole animation feel like an inky tattoo. I played around in RS Toon node for quite a while, until I found a new look! I created new 2D opening and closing scenes to match the style as well. Along the way, I was also able to clean up several models and movements that just weren’t clicking on the previous version.
I still think of this project as a work in progress, but I am pleased with how far it has come and how much more comfortable I have gotten in the world of 3D animation! Maybe I’ll revisit it next year and see what else I’ve learned…