This illustration was created for my surgical illustration course. It depicts two sequential steps of a left upper lobe (LUL) lung segmentectomy. The robot-assisted surgery was performed by Dr. Stephen Yang (thoracic surgeon, Johns Hopkins Medicine). A segmentectomy refers to a procedure to remove portions of the lung that contain cancerous tumors, in this case the apicoposterior and anterior segments of the left lung.
I worked with Cory Sandone as my faculty advisor to illustrate a particularly difficult portion of the procedure: locating and isolating the anterior pulmonary artery branch for division. I sketched out every step of the surgery to be used as a slide presentation for an audience of medical professionals, but only one was chosen to be a fully rendered piece. Follow along below to learn more about the creation of this piece!
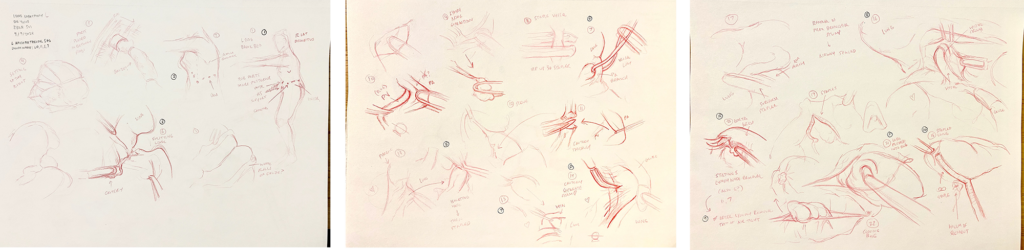
My OR sketches were created in real time as I watched the surgery being performed. As this was robot-assisted, most of my view came from an overhead monitor projecting the view of the camera inserted into a port. It took a while to get used to this type of surgery, as it went by very fast and the changing angles of the camera got to be disorienting at times. To help my future self make sense of the fast sketches, I made sure to keep an ear out for Dr. Yang’s commentary so I could scribble down enough notes to piece together as many details about the surgery as I could, such as the type of staple loads used and which lymph nodes were being removed.
Afterwards, I read through the operating notes and several papers about LUL segmentectomy surgeries to help clarify what I had seen in the OR. I found some of the anatomy to be quite difficult and hard to visualize in conjunction with the steps of the procedure, so I decided to do some rough sketches of the anatomy to help orient myself. I also had access to a cadaveric lung where I was able to dissect all the relevant vasculature and structures that would be present in the illustrations.

Once I felt like I had a good grasp of the surgery and relevant anatomy, I wrote out a succinct list of the steps of the procedure to determine how many images I would need to create and what each one should depict.
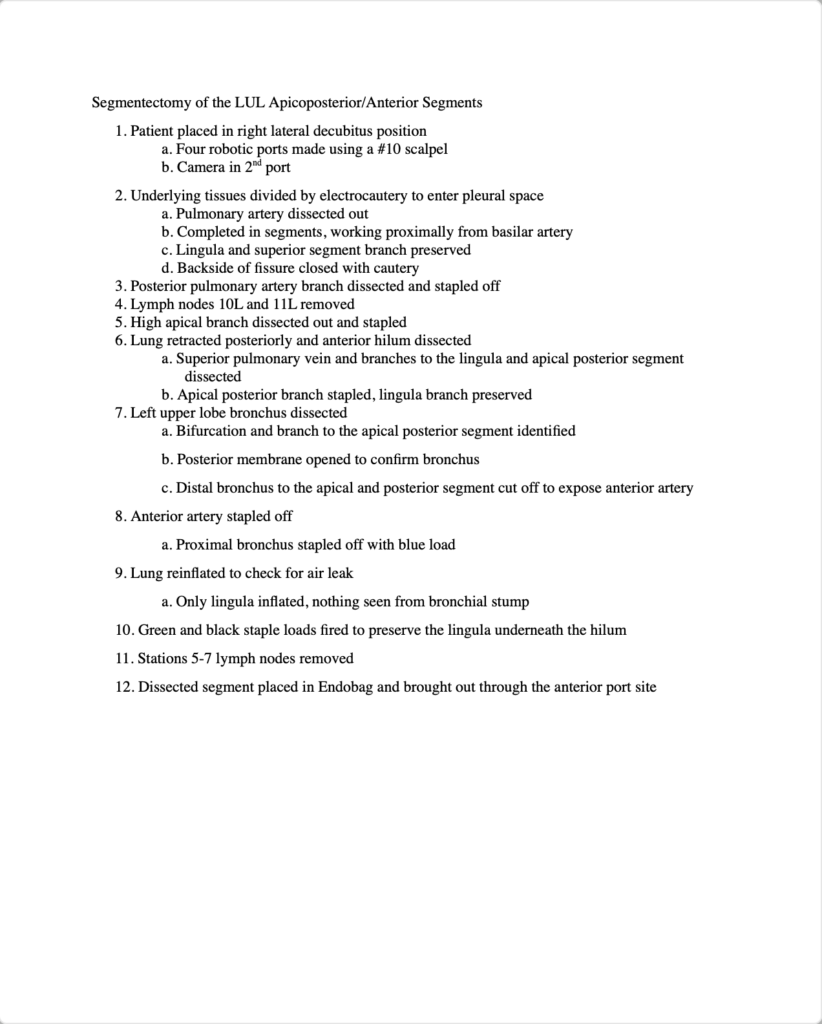
To begin my rough sketches, I first modeled some very crude tools and vessels in C4d to mess around with perspective and lighting.
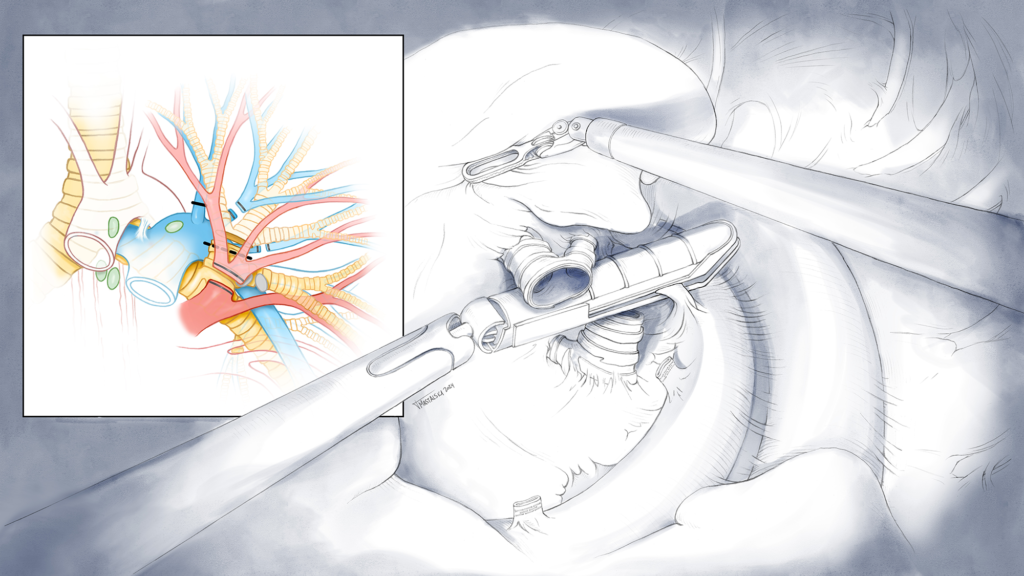
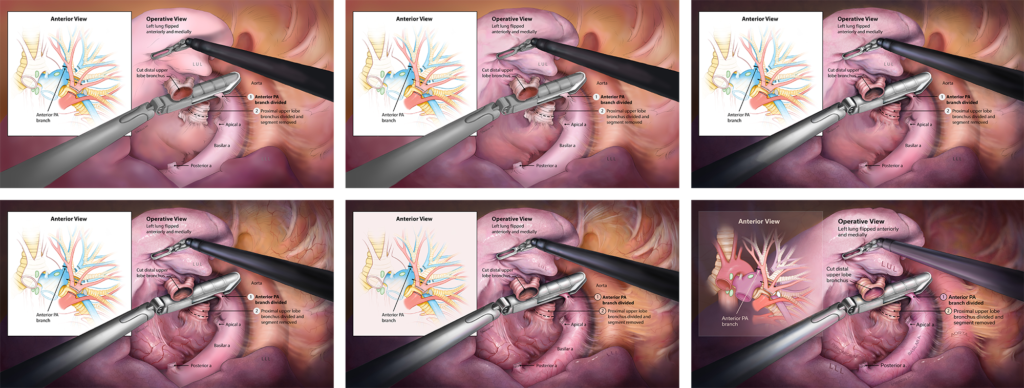
Once I found an angle I felt best depicted all the anatomy in an operative view, I sketched out each step of the surgery using my OR sketches, my 3D models, and anatomical atlases as references. Because my early diagrammatic sketches of the lung proved very helpful in my understanding of the complex anatomy, I thought a viewer might also find them useful. I decided to include a diagrammatic representation of the anatomy to accompany each operative view illustration. As the surgery progresses, whatever structure is being manipulated in that illustration is highlighted in the diagram to the left. The diagram will help the viewer better understand the relationships between structures and see clearer how the surgery progresses as a whole. Three select sketches are shown below:

After a round of critique from both Dr. Yang and my professors, I made adjustments to my sketches, cleaned them up a bit, and added cleaner labels to create rough layouts of each slide.

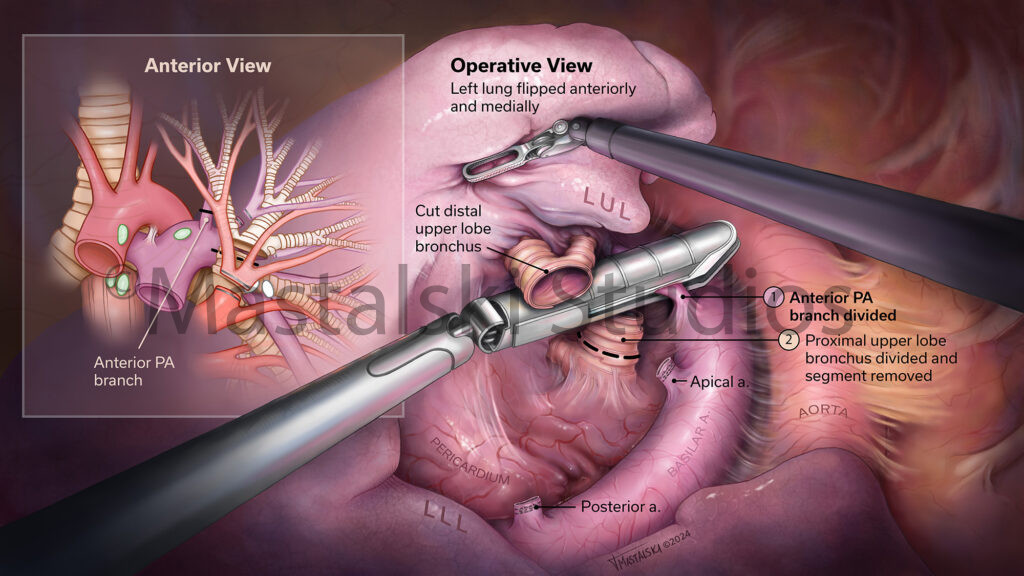
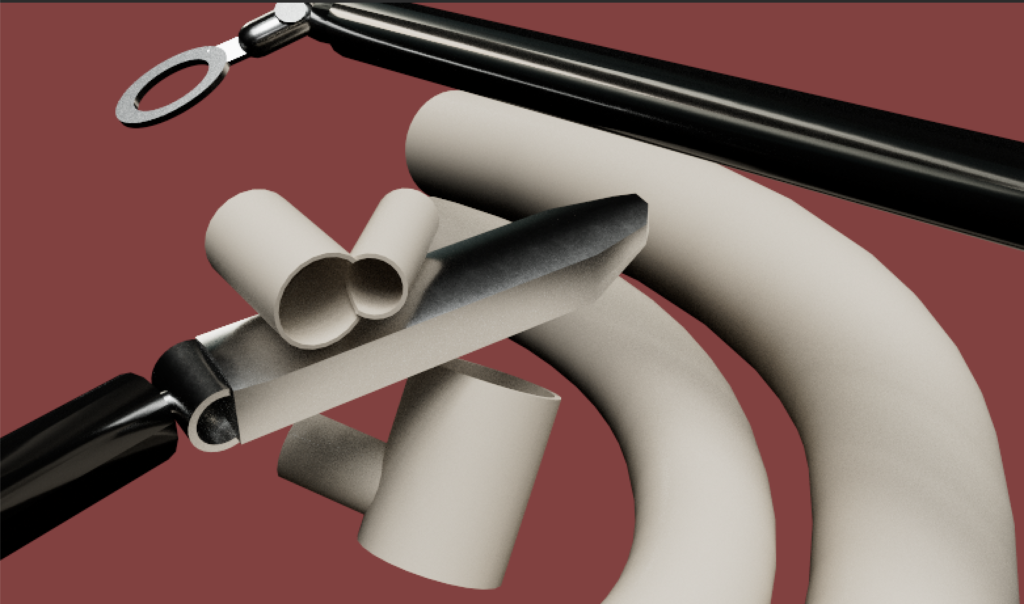
After another round of critiques, I chose one sketch to be rendered to completion. I chose to render the slide detailing how the anterior PA branch was divided as Dr. Yang had explained to me the difficulties of reaching it. Obscured from view due to the upper lobe bronchus, an intricate series of steps had to be performed to isolate the branch without nicking any other structure in its close vicinity. A transfer sketch was completed for this slide with graphite and brought into Photoshop.
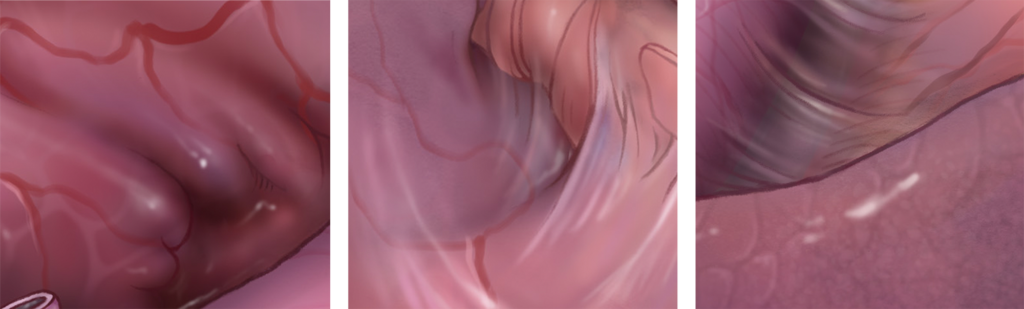
To begin rendering, I first put down a shadow layer. Robot-assisted surgeries lend well to dramatic lighting as the only light source inside the body is coming from the camera. I wanted to capture this effect in the illustration, so I first mapped down where I wanted the camera’s spotlight to be focused on.
I then plugged away at adding blocks of color, then additional shadow and highlight layers, and finally got to have some fun with textures and details. I really enjoyed adding in flecks of highlights to adhesion tissues and creating a believable deflated lung texture.
A change was made to the diagram inset very late in the process as the primary-colored didactic structures began to look very disjointed from the more natural purple-y tones in the operative view. To combat this, I simply color-picked from the operative view and used those colors in the inset. The surrounding box also became transparent as the more opaque box was too stark in comparison to the spotlighted operative view.
Here is the final slide: