This illustration was made for my surgical illustration course. It serves as an overview of the surgical procedure to implant the Compress Device® within the femur of an amputated residual limb. The surgery was done by Dr. Brock Lindsey (orthopedic surgeon, Johns Hopkins Medicine) and Dr. Lily Mundy (plastic surgeon, Johns Hopkins Medicine). The Compress Device® is a type of osseointegrated prosthesis created by Zimmer Biomet and is currently undergoing clinical trials at Johns Hopkins. The surgery I observed was only the second of its kind completed at the hospital and in the United States. It was an incredible experience to observe this operation firsthand, and I had an amazing time creating this piece.
I worked with Lydia Gregg as a faculty advisor to create an illustration of the major steps of the surgery for use in a hypothetical surgical journal. Every step of the surgery was sketched and planned for a mock journal layout, but only a handful of the sketches were fully rendered in my final illustration. So read on for the full process of the piece’s creation below:
My first sketches of the procedure were hurriedly drawn in the operating room as the surgery was taking place. The procedure was listed as a “muscle flap creation”, so I was unaware of the uniqueness of this surgery until shortly before it started! As this was a rare case, the room was full of observers, which made getting a decent view quite tricky. Luckily, an overhead camera projected to a screen helped fill in whatever I couldn’t see directly. My goal was to draw the entire procedure start to finish, and although it was a bit rushed at times, I managed to record it all there in some form!
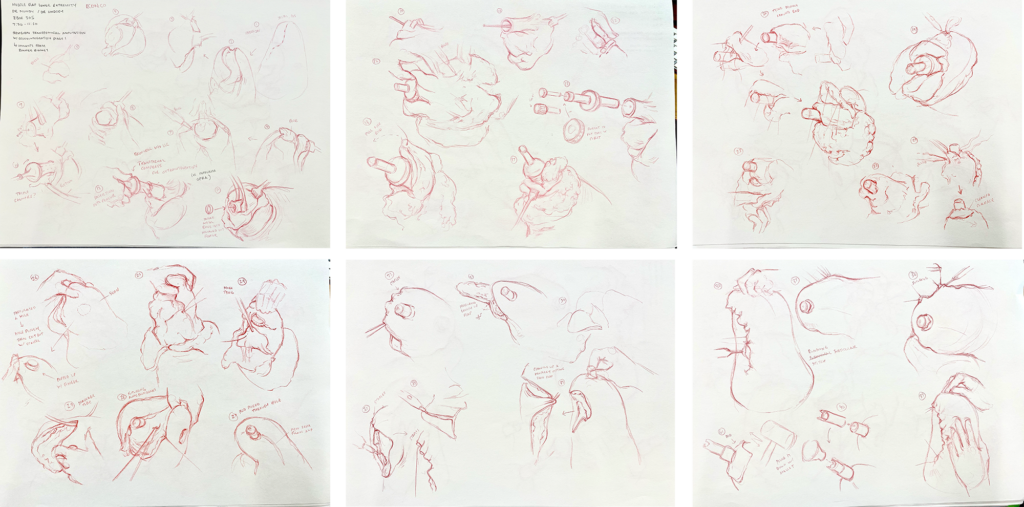
Back in the studio, I researched the procedure, obtaining several papers online, a manual for the device, and operative notes written by Dr. Lindsey and Dr. Mundy. From there, I compiled a list of each step of the surgery to determine what to depict in each illustration. I started with 32 steps which were subsequently paired to 22 after combining several steps.

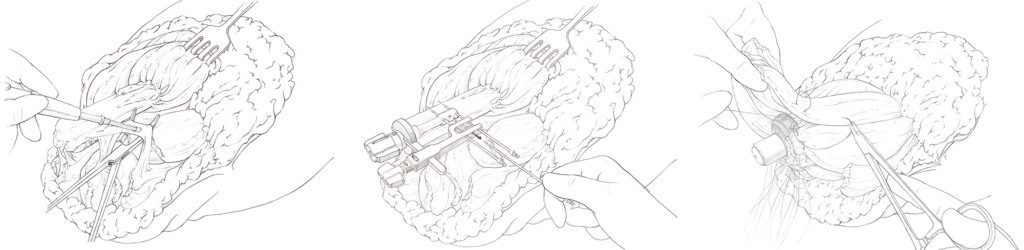
I then proceeded to sketch out on paper each of the aforementioned 22 steps (three are shown below).
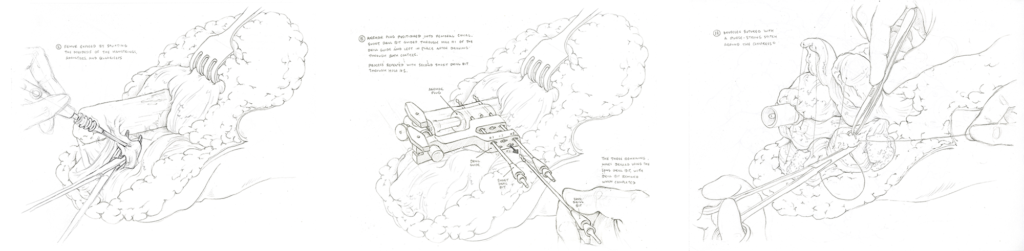
I utilized C4d to make crude models of all the unique instruments and devices used by the surgeons. I did not have access to the physical devices, so using 3D models helped me visualize their geometries and perspectives in space better than the more orthographic views in the manual.
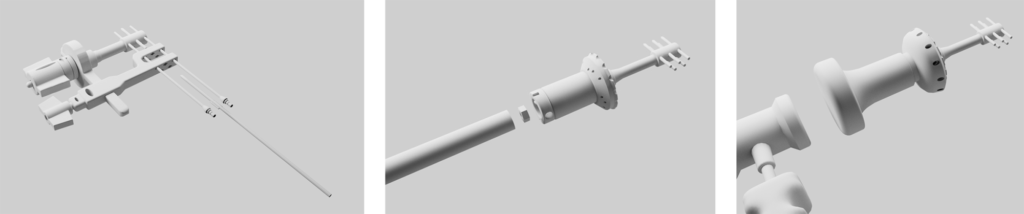
After a work-in-progress critique with my professors and a brief consultation with Dr. Lindsey, I made edits to each of my illustrations, by hand or Photoshop, depending on the complexity of the change. At this time I also learned the manual I had used was outdated, and the device used in this surgery was an improved model! I had to work quite quickly to redo several of my 3D models and sketches to reflect the new design.
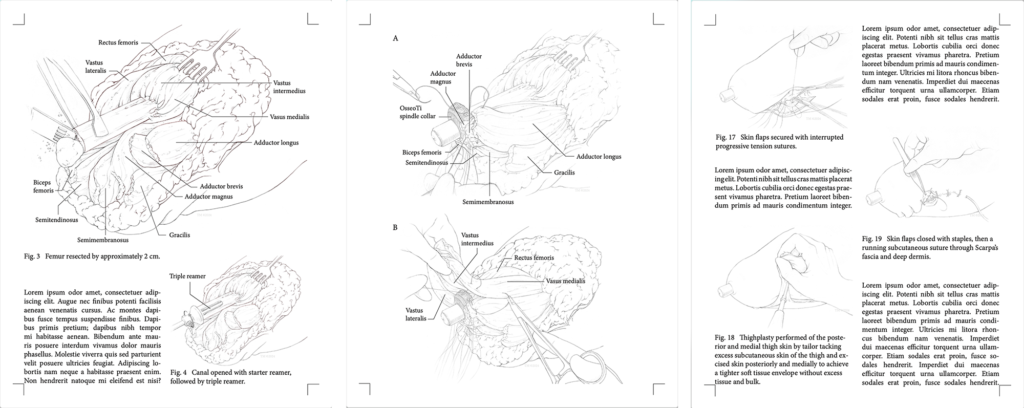
With prettier sketches and updated devices, I was tasked with formatting my illustrations into a mock journal to include spaces for text, captions, and labels. It was a good exercise to think about layout and how to best group images onto each page. A few pages are shown below.
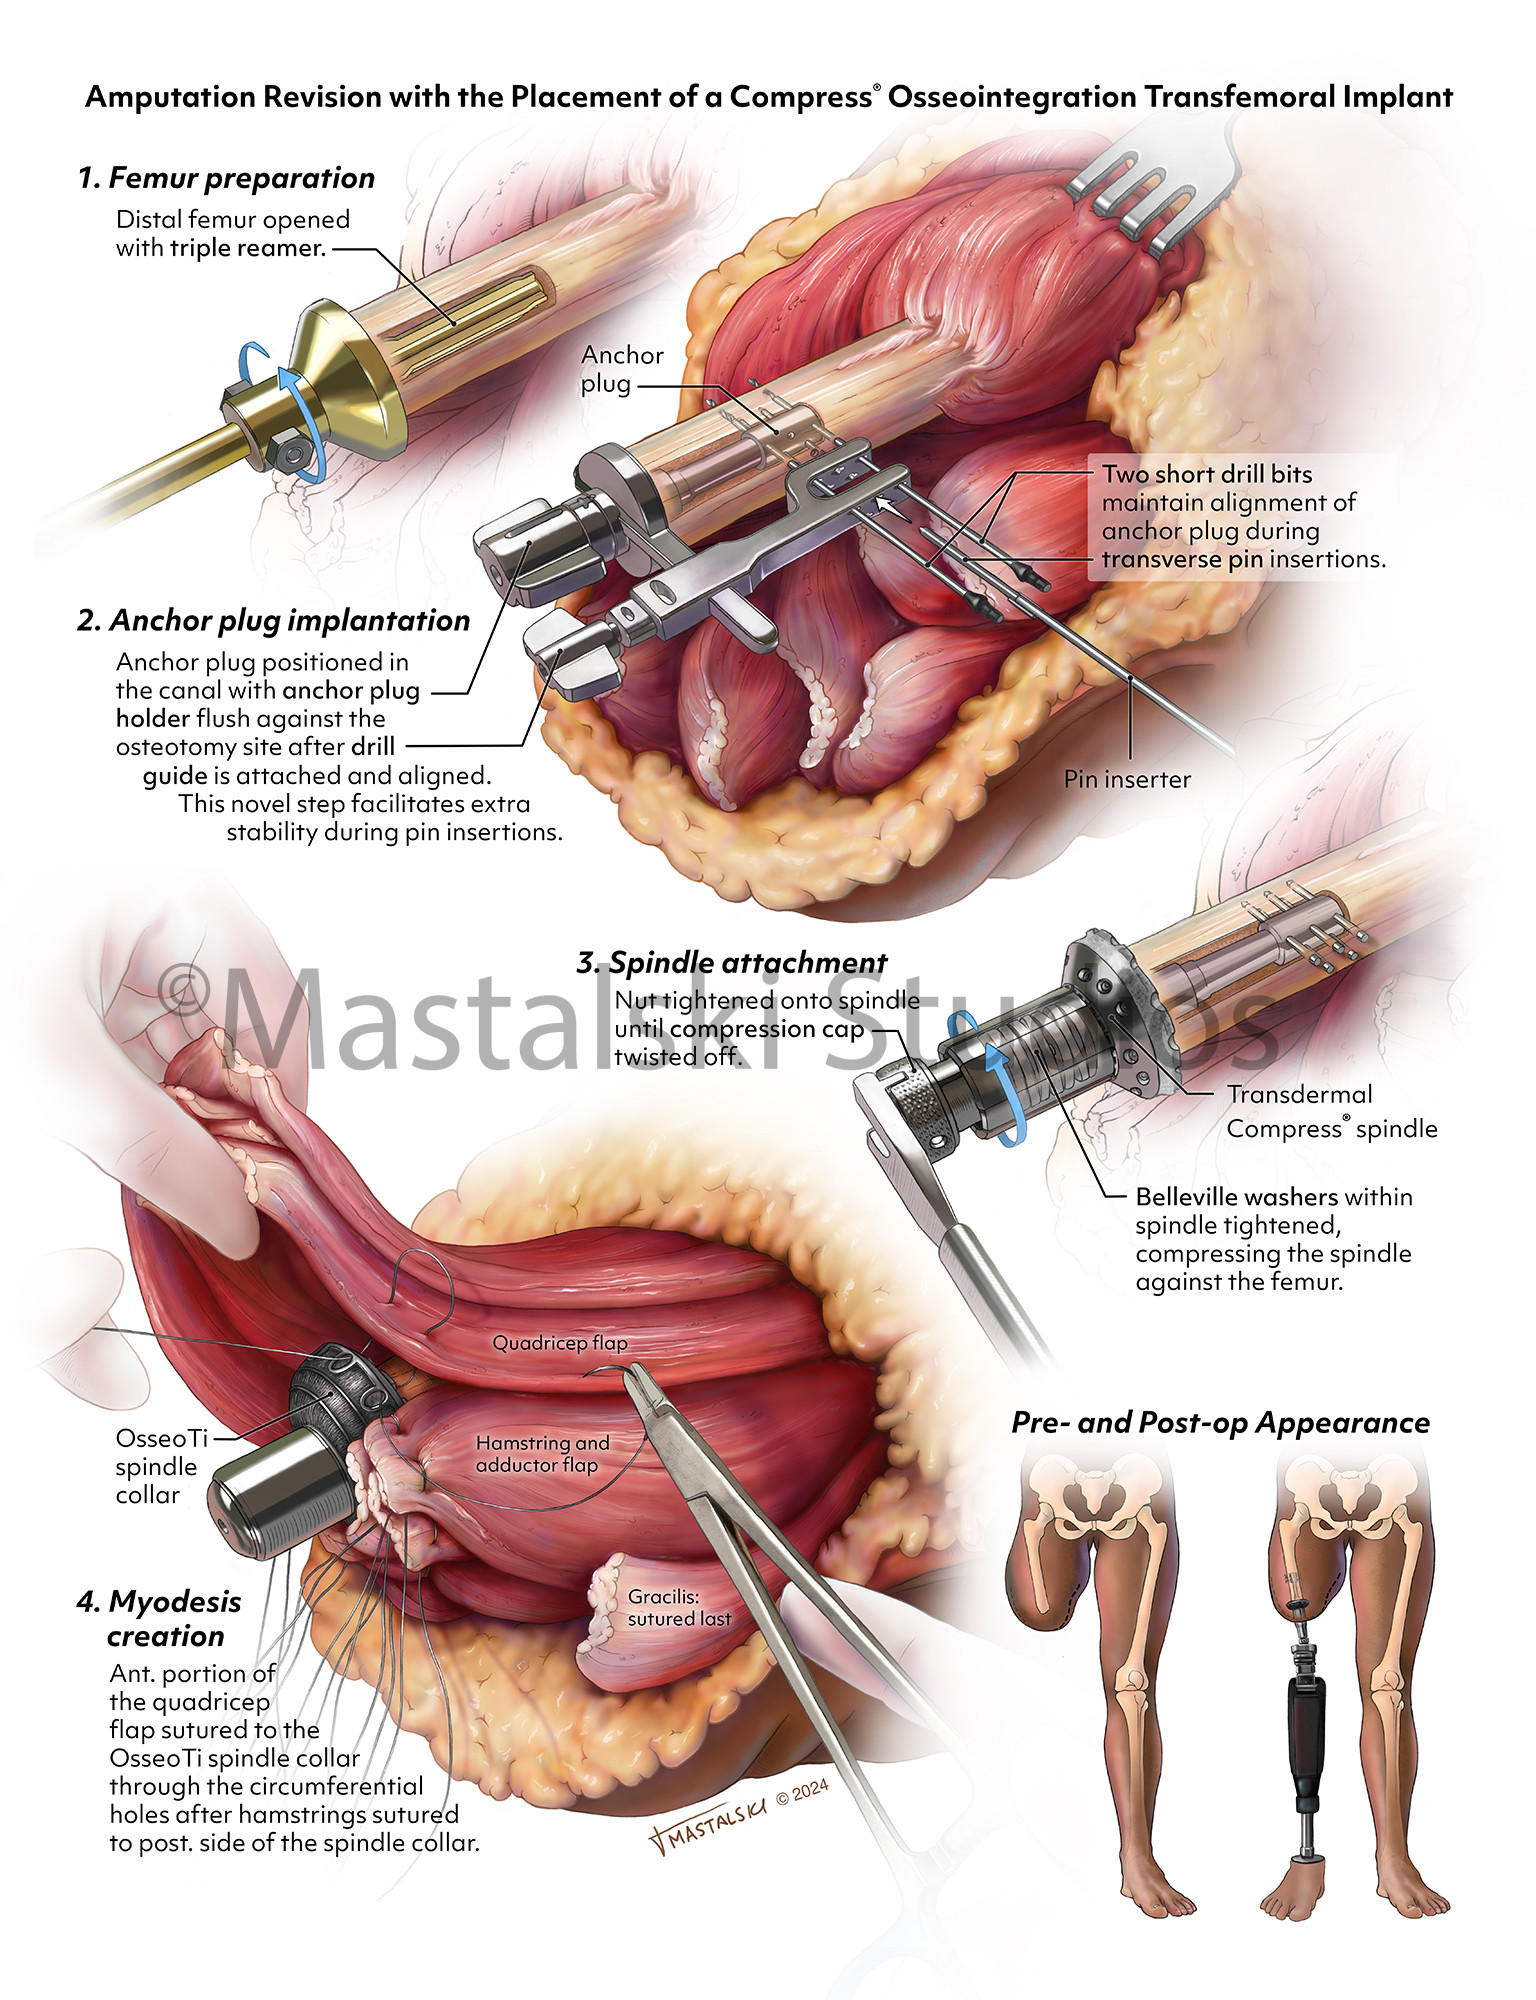
Then, I experimented with what image(s) I wanted to fully render and how to lay it out. The final illustration was meant for a journal illustration, so I knew I wanted to show a process with multiple steps. I played around with an overall summary of the entire procedure as well only the creation of the muscle flap. In the end, I decided to illustrate a brief summary of the surgery as I thought it important to show the device itself.
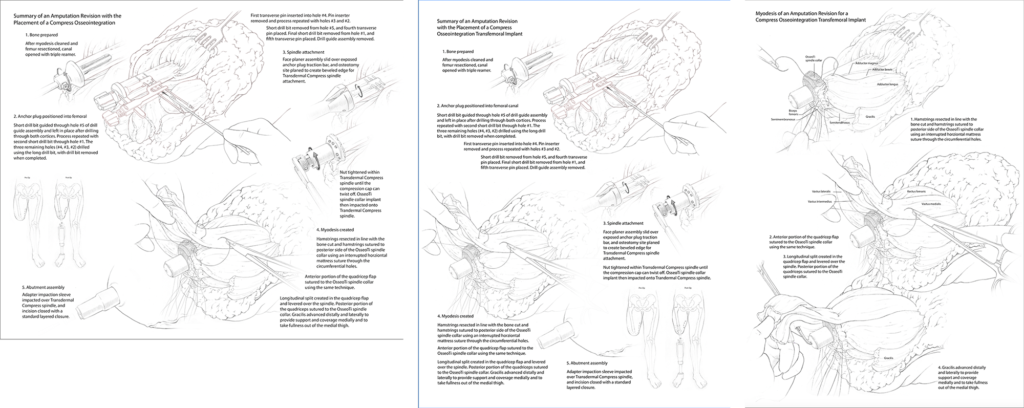
After many revisions, I settled on this final layout, depicting four steps of the procedure and a before and after image of the amputated leg.
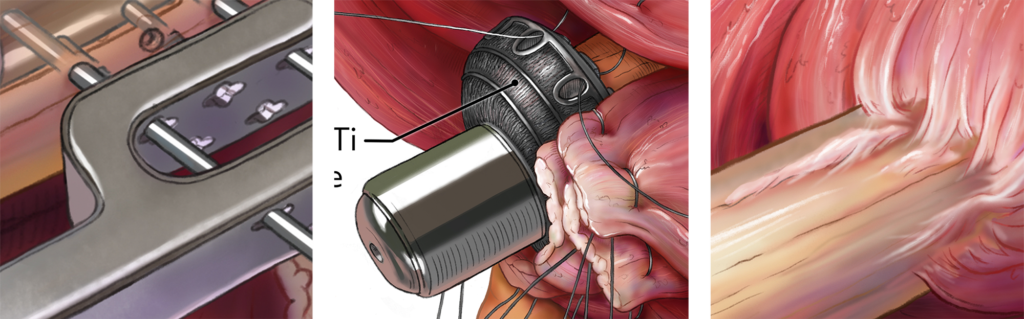
Finally, I colored it and intermittently made minor tweaks to the layout and word story as necessary. I did my final rendering in Photoshop with each illustration in its own file. Prior to this surgical illustration, I didn’t have much experience rendering muscle, or fat, or metal for that matter, so it was a challenging, but rewarding, assignment to complete.
And this is the final illustration!